Auto Fill (Excel)
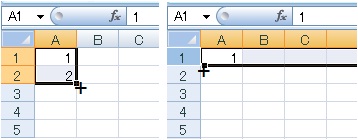
Excel has a very handy feature called Auto Fill which allows you to automatically copy preset data to adjacent cells.  button is called “Fill Handle” which appears at the lower right of cell(s), or at the upper right of selected column (see Fig. 1). if you bring mouse pointer close to this button, the appearance of this button changes to +mark. Auto Fill is commonly conducted by dragging this mark toward arbitrary direction.
As shown in Figure 1 right, dragging toward right enables you to set an identical column-width automatically.
Figure 1.

In case of single cell
Figure 2.

Content of cell is simply copied toward the direction of dragging. If the cell contains number as "Chapter 1", formula, or list items (see Figure 2.) subsequent data are altered automatically.
In case of two cells
Figure 3.

In both cases in Figure 3, running number appears by dragging. The case right, all data filled in Row-1 are also copied.
Case of 4 cells selection
Figure 4.

Dragging must be done stepwise i.e. dragging to downward followed by releasing mous for a short time and subsequent dragging rightward, or following dragging rightward, short halt and dragging downward must be continued.
In the case(A), Calendar-like style may appear, on the other hand case (B) creates a Multiplication Table.
Copying of Table Formatting
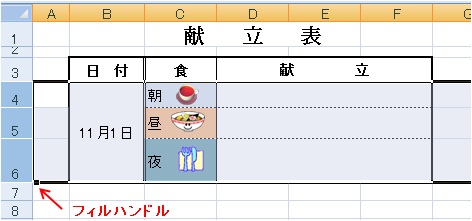
Figure 5.

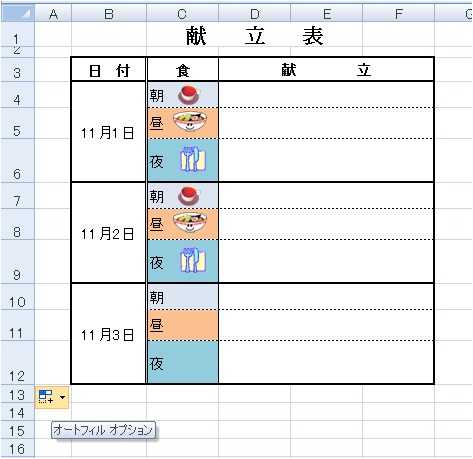
Figure 6.

Selection as seen in Figure 5. and subsequent dragging allows you to create table with an identical formatting.(see Figure 6.) This method is not applicable for copying picture more than 3 items.
Application
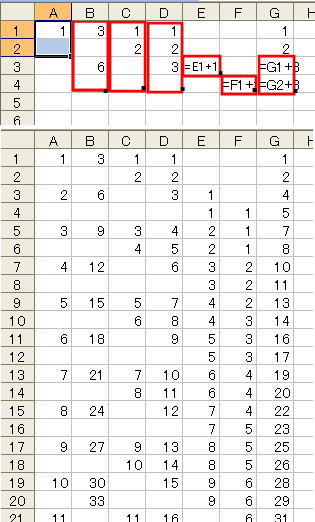
A variety of technique for filling regulated sequences. Upper part shows the selection of cells, and down part are resulting sequences.
Figure 7.

このサイトで扱った項目

 button is called “Fill Handle” which appears at the lower right of cell(s), or at the upper right of selected column (see Fig. 1). if you bring mouse pointer close to this button, the appearance of this button changes to +mark. Auto Fill is commonly conducted by dragging this mark toward arbitrary direction.


